Pre-record a Lecture Using Microsoft Teams
Learn how to easily record a lecture using Microsoft Teams, allowing you to capture important information and easily share it with students or colleagues. This step-by-step guide will help you create engaging and educational content with just a few clicks.
Table of Contents

Estimated time to read this article: 5 minutes
Introduction
Microsoft Teams allows you to create, share, and collaborate on online meetings, chats, and files. You can also use it to record your lectures and share them with your students. Screenpal is a more powerful recording tool with editing capabilities, but some faculty may be more comfortable working in Microsoft Teams. This article will show you step-by-step instructions for pre-recording a lecture using Microsoft Teams in a few simple steps.
🗺️ Record and Share a Lecture Using Microsoft Teams
Step 1: Create a Meeting
To record a lecture, first create a meeting in Microsoft Teams. You can do this by following these steps:
- Open the Microsoft Teams app on your computer.
- Click on the Calendar icon on the left sidebar.
-
Click on the New Meeting button on the top right corner.

- Fill in the details of your meeting, such as the title, date, and time. Recommended: Use a descriptive title that makes sense to you and your students, e.g. BIOL1022 Anatomy and Physiology II Week 4 Pre-recorded Lecture
-
Click on the Save button to create the meeting.

Step 2: Start the Meeting
Once you have created the meeting, you can start it by following these steps:
- Go to the Calendar tab on the left sidebar.
-
Find the meeting you created, click on it, and then and click on the Join button.

-
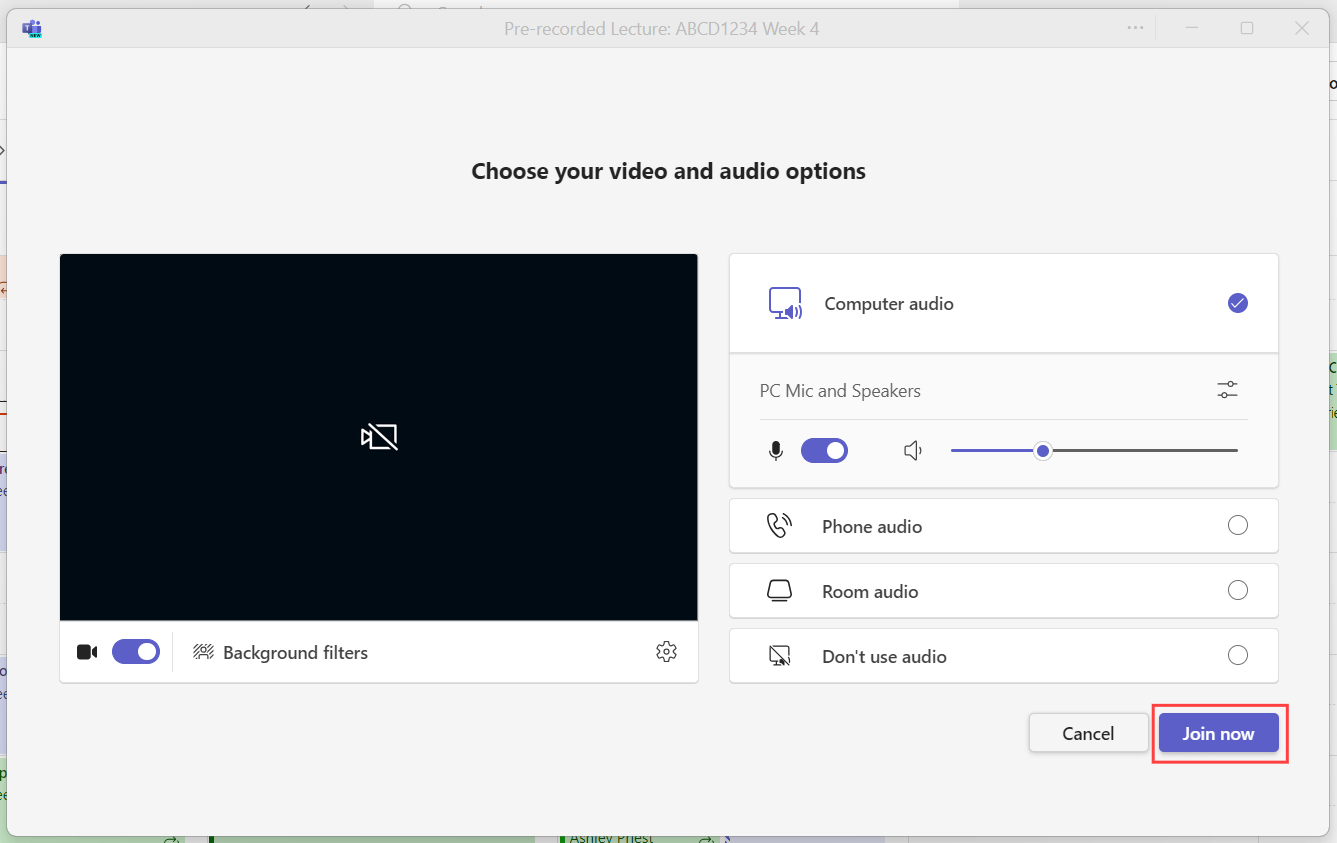
Select the audio and video settings you want to use for the meeting, and then click on the Join Now button to start the meeting.

Step 3: Record the Meeting
After you have started the meeting, you can record it by following these steps:
- Click on the More Actions button (the three dots) on the meeting toolbar.
-
Select the Start Recording option from the menu.

-
A red dot will appear on the top left corner of the meeting window, and you will also see a popup confirming that recording and transcription has started.

- Deliver your lecture as you normally would.
-
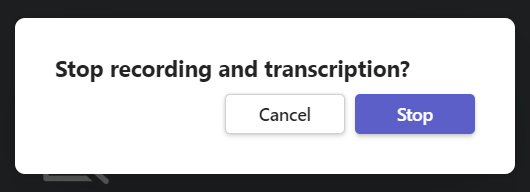
When you are done, click on the More Actions button again and select the Stop Recording option from the menu. A pop-up will appear on the screen asking you to confirm that you'd like to stop the recording and transcription.


-
End the meeting by clicking the dropdown arrow beside the red Leave button in the top right corner.

Important!
Microsoft Teams recordings cannot be paused - only started and stopped. If you start a recording, stop it, and then start again, the recording will be saved as two separate files.
Step 4: Share the Recording
After you have recorded the meeting, you will need to edit the viewing permissions and expiration date.
-
Go to the Chat tab on the left sidebar. Find the chat of the meeting you recorded and click on it. Scroll down to the bottom of the chat and find the message that says that the recording is ready. Click on the More Options button (the three dots) on the recording toolbar, and choose Open in Stream.

-
Click on the expiration notice, and choose the option that makes the most sense for your course and content (some lectures may not need an expiration, while some may be based on a fast-paced industry with frequent updates and should expire).

-
Now click on the Share button in the top right corner and choose Copy link.

- From the pop-up, click Settings.

- Select People in Georgian College and click Apply. The link will automatically be copied.


- Paste the link in Blackboard, an email, or wherever else you'd like to share it with students.
Congratulations! You have successfully recorded and shared a lecture using Microsoft Teams.
📄 Additional Resources
- Microsoft Teams (CTL Knowledge Base)
- Microsoft Teams Help and Learning (Microsoft Support)
- Microsoft Teams Video Training (Microsoft Support)
- Teaching with Microsoft Teams (eCampusOntario Guide)
- What's new in Microsoft Teams
📄 Need More Help?
Please email facultyedtech@georgiancollege.ca for more support.
🙋 Did you find what you need?
Let us know! Click the "Give feedback about this article" link at the bottom of this page or use the "Contact Us" button at the top of your screen to help us improve this resource or develop new knowledge base articles.

